Sunday 22 April 2012

Covered Shopping Bag Tutorial

Remember these, I have made lots of them and everyone loves the bags. They have 4 good sized pockets 2 on the inside and 2 on the outside.
Sewing level Beginner to Intermediate.
Eileen, Sarah and I are going to make some to sell at the Murrumbateman Fields Days.


The Promised Tutorial


It may seem like a lot of steps but the bag takes about 1.5 hours to make and all straight sewing.
I am going to give Fabric.com a plug here. The are a fantastic company with the cheapest prices and very reliable. Go to www.fabric.com and then home decor for the fabrics used in all bags shown here. The fabric delivered to Australia is usually around $10 a 37" yard and they have a really good range.


Supplies

70 cm fabric. I use furnishing fabric where possible as it is firmer and more durable.

Scissors/Rotary cutter

Pins

Tape Measure

Matching thread

Store bought reusable tote bag. This one is from David Jones but most larger stores and supermarkets have them

Magnetic Snap Closure (optional)


Measure the width and length of your bag. Measure the length and width of the handles. Write down these measurements including seam allowance.
Here is what I wrote down


Using the Measurements you have written down add 1" seam allowance to the length and width of the body piece and the handles. This bag body measured 42" in width and 12" in length. I cut my body fabric at 43"X13". The handles were 24"x 2". I cut the handles 25"X 3"


Cut

1 piece for the body of the bag

2 strips for the handles

2 large pockets + 2 lining pieces

2 smaller pockets + 2 lining pieces


Fold 1/2" seam allowance on each side of your handles and press


Pin the handles to the top side of the bag handles.

Stitch the fabric to the handle 1/4 inch seam allowance.


Stitch down both side of the handles
 
Pockets with linings cut out


Place the fabric right sides of the pocket fabric together and stitch around the pocket leaving a space at the bottom to pull through to the right side


Clip the corners before pulling through to the right side


I use a chop stick to push the corners out


Iron all the pockets nice and flat


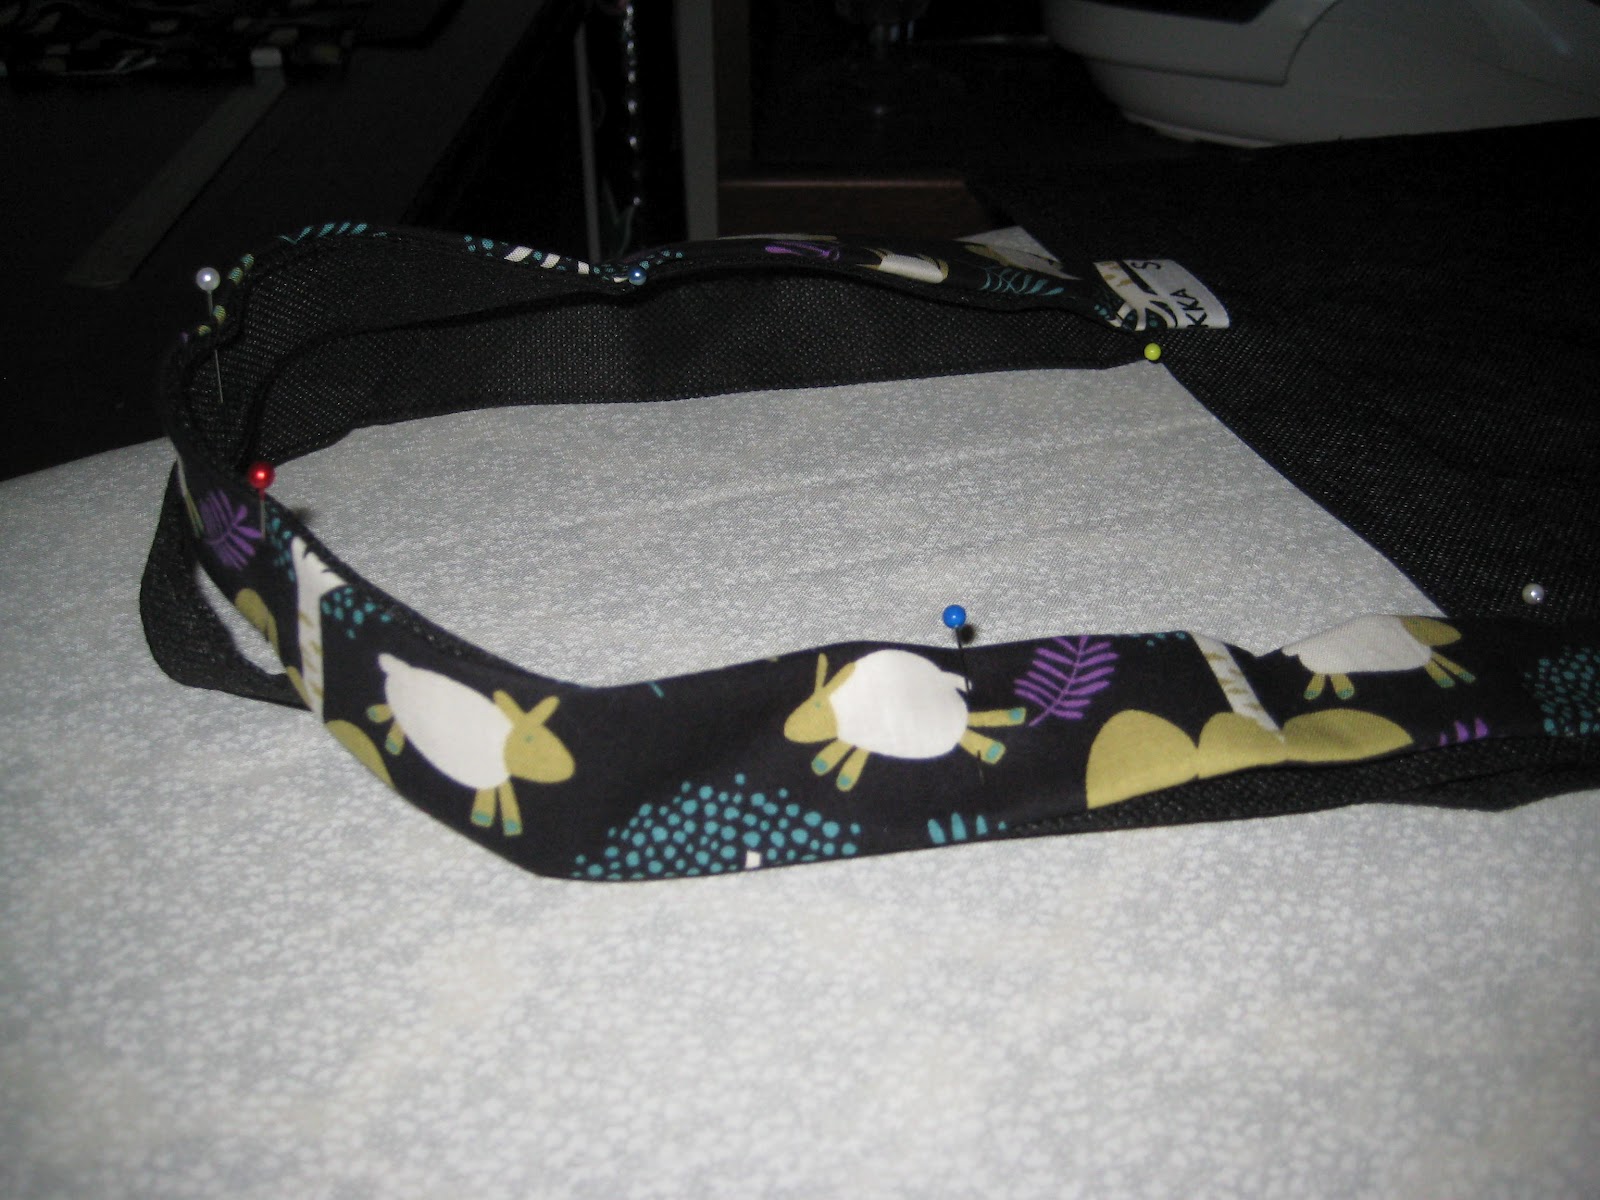
Pin the inside pockets as shown here


Stitch the inside pockets to the bag


Press 1/2 inch seam allowance to the top and botton of the body of the bag fabric

Sew the short sides of the bag fabric to make a tube.
Pin the bag fabric tube to the tote bag.


Make the closure if, you decide to use one. A small pocket of fabic sewn on three sides. I put ironed some interfacing on the closure pocket to give it some strength. Leave the top open as it will be stitched with the bag fabric.


Place the closure button in place.
This is how mine worked 


Mark the cutting lines using the back of the closure  as your template. Cut smal slits in the fabric.


Place the top half of the closure on the bottom of the fabric then slide the back half into the pocket and secure


Pin closure in place on the bag. And place the other closure on the other side of the bag.


Stitch around the top of the bag. Stop at each corner and hop over the corner and then keep sewing to the next corner.


Stich down the cornes


Pin the outside pockets and stitch in place


Here the the finised bag


This is the view from the sewing room window. Must get too and wash the windows some day soon.


Monday 16 April 2012

Making Soap

I have wanted to make soap for years but always worried that the process would be too difficult and ingredients hard to find. My dear sheep friend Eileen hooked me up with this site http://down---to---earth.blogspot.com.au/. It is a really interesting site that I love. I did not know at the time, but my daughter Alison also likes Ronda's site and got the idea to make home made Christmas presents from Rhonda. Alison wants to make soap as part of homemade Christmas. I checked out Rhonda's soap making tutorial and asked Alison if she wanted to help. http://down---to---earth.blogspot.com.au/2011/08/how-to-make-cold-processed-soap-v-2.html. We had a good time and the soap tutotrial was easy to follow also ingredients were easy to find. That was six weeks ago and we are know using our first homemade soap. The soap lathers up well and leaves your skin moisturised.
Eileen has also used Rhonda's recipe to make the soap and replaced the Copha/Coconut oil with rendered lamb fat. I used a cake of that soap and it was also excellent. I am going to try that as well

This brand of Caustic Soda is sold at Woolworths and Bunnings. Caustic Soda is a product that needs to be handled with care. Please follow the safety instructions carefully.

They also have a good recipe

http://www.pascoes.com.au/common/pdf.php?which=362&field=FILE_2

Resonably priced silicon molds can ber found here
http://stores.ebay.com.au/Walden-Accessories?_trksid=p4340.l2563

Here is the batch I made on the weekend


All the soaps layed out on the drying racks. The soap needs to cure for about 6 weeks. In that time the soap becomes hard and lasts a long time

The darker soaps were sented with Vanilla essential oil which was brown in colour and added a more creamy colour to the soap.

The white soap was perfumed with Bulgarian Rose oil which was clolourless so the soap has remained white

The soaps need to be turned each day so they dry evenly

I really enjoyed making the soap and it was easy.

Sunday 15 April 2012

Lamb Sausages

A week ago we arranged for 3 sheep to be humanly slaughtered and butchered ready for the freezer. It is very important for me that the animals do not suffer at all in the slaughter process so death is instantaneous and painless. Kim picked up the 3 cooler bins full of wonderful home grown lamb. I packed up all the meat into meal sized portions and put them in the freezer. People often ask us for our butchered lambs but we just are not able too. We barely grow enough for ourselves.
This time I decided to try making lamb sausages and see how they turned out. The whole process of  boneing the meat then mincing and finally making the sausages took a while. The sausages were so good and made use of cuts of meat that most people would disgard.

Take all the meat from the bones and save the fat


This is lamb shoulder boned ready for the mincer


These are the breast flaps and scraps. Some people would disgard these cuts or give them to the dogs. I stripped off all the meat and fat and then gave the bones to the dogs.


What was 5 kilos of scrap meat turned into 4 kilos of meat for mincing


The finished product. I cooked some sausages straight away and they were delicious
Lamb Sausage Recipe
Ingredients:

3 kilos minced lamb. Butchers recommend at least 30% fat to get a nice sausage. I minced most of the fat from the cuts of meat.
1 tablespoon extra virgin olive oil
1 finely mince onion
4 large cloves garlic, finely minced
4 teaspoons smoked sweet paprika (Pimenton)
2 teaspoon white pepper
3 teaspoon ground cumin
2 teaspoon  chilli powder (opt)
2 tablespoon kosher salt
2 teaspoon sugar

Directions:

1) Warm oil in a medium frying pan. When oil shimmers, saute onions and garlic over medium heat until translucent , about 4 minutes. Add all spices and cook for 2 minutes. Remove from heat. Cool completely.
2) Combine onions mixture bowl. Cover and chill from 2 to 24 hours. Form into patties or logs. In my case I bought sausage casings from the butcher and then used the sausage attachment on the mincer.  Sausage may be refrigerated for up to a week. It may also be frozen.

This is a really tasty lamb mince recipe that my family loved.

This is what the recipe looks like as patties


Tuesday 3 April 2012

Green Tomato Pickle

Autumn is here and the cooler weather is just around the corner. We have already had the fire going on a couple of occasions. Time to clean out the vegetable patch and use up the remaining green tomatoes. I collected a bucket of green Black Russian tomatoes and whipped up double batch of green tomato pickle. One batch was chill and one regular. Both batches have been tested by family and friends who have loved the flavour.


Green Tomato Pickle


Green Tomato Pickle (adapted from an old  School Cookbook - I have added my changes to the recipe in brackets)


6 lbs green tomatoes (approx 2.7 kgs)
1 tablespoon mustard
1 tablespoon curry powder
3/4 lb of treacle (I used 500g of brown sugar)
3 pints vinegar ( 1of a bottle of Ezy Sauce instead)
1 teaspoon cayenne (I used black pepper)
3 lbs onions (approx 1.3 kgs)
2 apples
2 tablespoons plain flour
2 tablespoons salt
1 teaspoon spice (I used Allspice, also added 2 tsp tumeric)
1 dozen cloves

I made a double batch because there were so many tomatoes. In the second batch I added 10 birdseye chillies to give the pickle a bit of zing.


(Sterilize jars by washing, then rinsing in very hot water, then place in a warm oven until completely dry. )

(1) Wash and slice tomatoes and peel and slice onions (and apples) add salt and let stand for 12 hours

(2) Put them with all other ingredients into a large pan and boil one hour, stirring frequently.

(3) When cold, bottle, cover and label (I did this while the relish was still warm)

This made 12 large jars of pickle.