Showing posts with label Tutorials. Show all posts

Tuesday, 26 June 2012

Homemade Laundry Detergant


I love Rhonda's blog "Down to Earth" http://down---to---earth.blogspot.com/.


So many wonderful tips on simple living, saving money, green cleaners, vegetables, life skills and cooking from scratch. I recently met her when I purchased her book and both Rhonda and her husband Hanno are wonderful people. I decided to try the homemade laundry liquid recipe from her book. It works a treat and I was so impressed that I made a batch for Skye and Alison they love it as well. Below is the recipe from Rhonda's blog. 

We live in the country on a farm and recycle our grey and black water which goes on trees in the paddock once treated. I decided not to use Borax opting for Napisan instead.


LAUNDRY LIQUID
Makes 10 litres
  • 1½ litres water
  • 1 bar Sunlight or generic laundry soap or any similar pure laundry soap, grated on a cheese grater OR 1 cup of Lux flakes
  • ½ cup washing soda – NOT baking or bicarb soda
  • ½ cup borax - I replaced Borax with Napisan
Please note that washing soda is different to baking soda. Sometimes there are two types of washing soda on sale - washing soda crystals and washing soda powder, buy the powder, it's easier to dissolve.

You may add any essential oil of your choice to these homemade cleaners. Oils like tea tree, eucalyptus, lavender or rose are ideal but are not an essential ingredient. They are not necessary to the recipe but do not detract from the effectiveness by adding them.


Tools
  • Saucepan
  • 10 litre bucket
  • Slotted spoon or wooden spoon for mixing
Above you can see the process.
In a saucepan containing one litre/quart of water add one cup of soap flakes.  Turn on the heat and stir. Bring the mix to the boil and when the soap flakes are dissolved add half a cup of borax/Napisan and half a cup of washing soda. The mixture will foam up as the washing soda and the borax/Napisan dissolve. Place the mixture in a 10 litre bucket and fill with water. Stir well. Keep stirring the liquid every 1/2 hour or so until the mixture is cool. The liquid will thicken as it cools. You can leave the liquid in the bucket if it has a lid or pour into containers. The mixture may look a little lumpy don't worry all the lumps dissolve during the wash and never leave any residue.

A basket of very clean washing
Add 1/2 cup to each load of washing. I have made four 10 litre batches from the original ingredients and still have enough to make a few more batches - very economical at about $2 for 10 litres of detergent.

I recycled a water 10 liter container for the laundry detergant. It has a tap very useful.

Sunday, 22 April 2012

Covered Shopping Bag Tutorial

Remember these, I have made lots of them and everyone loves the bags. They have 4 good sized pockets 2 on the inside and 2 on the outside.
Sewing level Beginner to Intermediate.
Eileen, Sarah and I are going to make some to sell at the Murrumbateman Fields Days.


The Promised Tutorial


It may seem like a lot of steps but the bag takes about 1.5 hours to make and all straight sewing.
I am going to give Fabric.com a plug here. The are a fantastic company with the cheapest prices and very reliable. Go to www.fabric.com and then home decor for the fabrics used in all bags shown here. The fabric delivered to Australia is usually around $10 a 37" yard and they have a really good range.


Supplies

70 cm fabric. I use furnishing fabric where possible as it is firmer and more durable.

Scissors/Rotary cutter

Pins

Tape Measure

Matching thread

Store bought reusable tote bag. This one is from David Jones but most larger stores and supermarkets have them

Magnetic Snap Closure (optional)


Measure the width and length of your bag. Measure the length and width of the handles. Write down these measurements including seam allowance.
Here is what I wrote down


Using the Measurements you have written down add 1" seam allowance to the length and width of the body piece and the handles. This bag body measured 42" in width and 12" in length. I cut my body fabric at 43"X13". The handles were 24"x 2". I cut the handles 25"X 3"


Cut

1 piece for the body of the bag

2 strips for the handles

2 large pockets + 2 lining pieces

2 smaller pockets + 2 lining pieces


Fold 1/2" seam allowance on each side of your handles and press


Pin the handles to the top side of the bag handles.

Stitch the fabric to the handle 1/4 inch seam allowance.


Stitch down both side of the handles
 
Pockets with linings cut out


Place the fabric right sides of the pocket fabric together and stitch around the pocket leaving a space at the bottom to pull through to the right side


Clip the corners before pulling through to the right side


I use a chop stick to push the corners out


Iron all the pockets nice and flat


Pin the inside pockets as shown here


Stitch the inside pockets to the bag


Press 1/2 inch seam allowance to the top and botton of the body of the bag fabric

Sew the short sides of the bag fabric to make a tube.
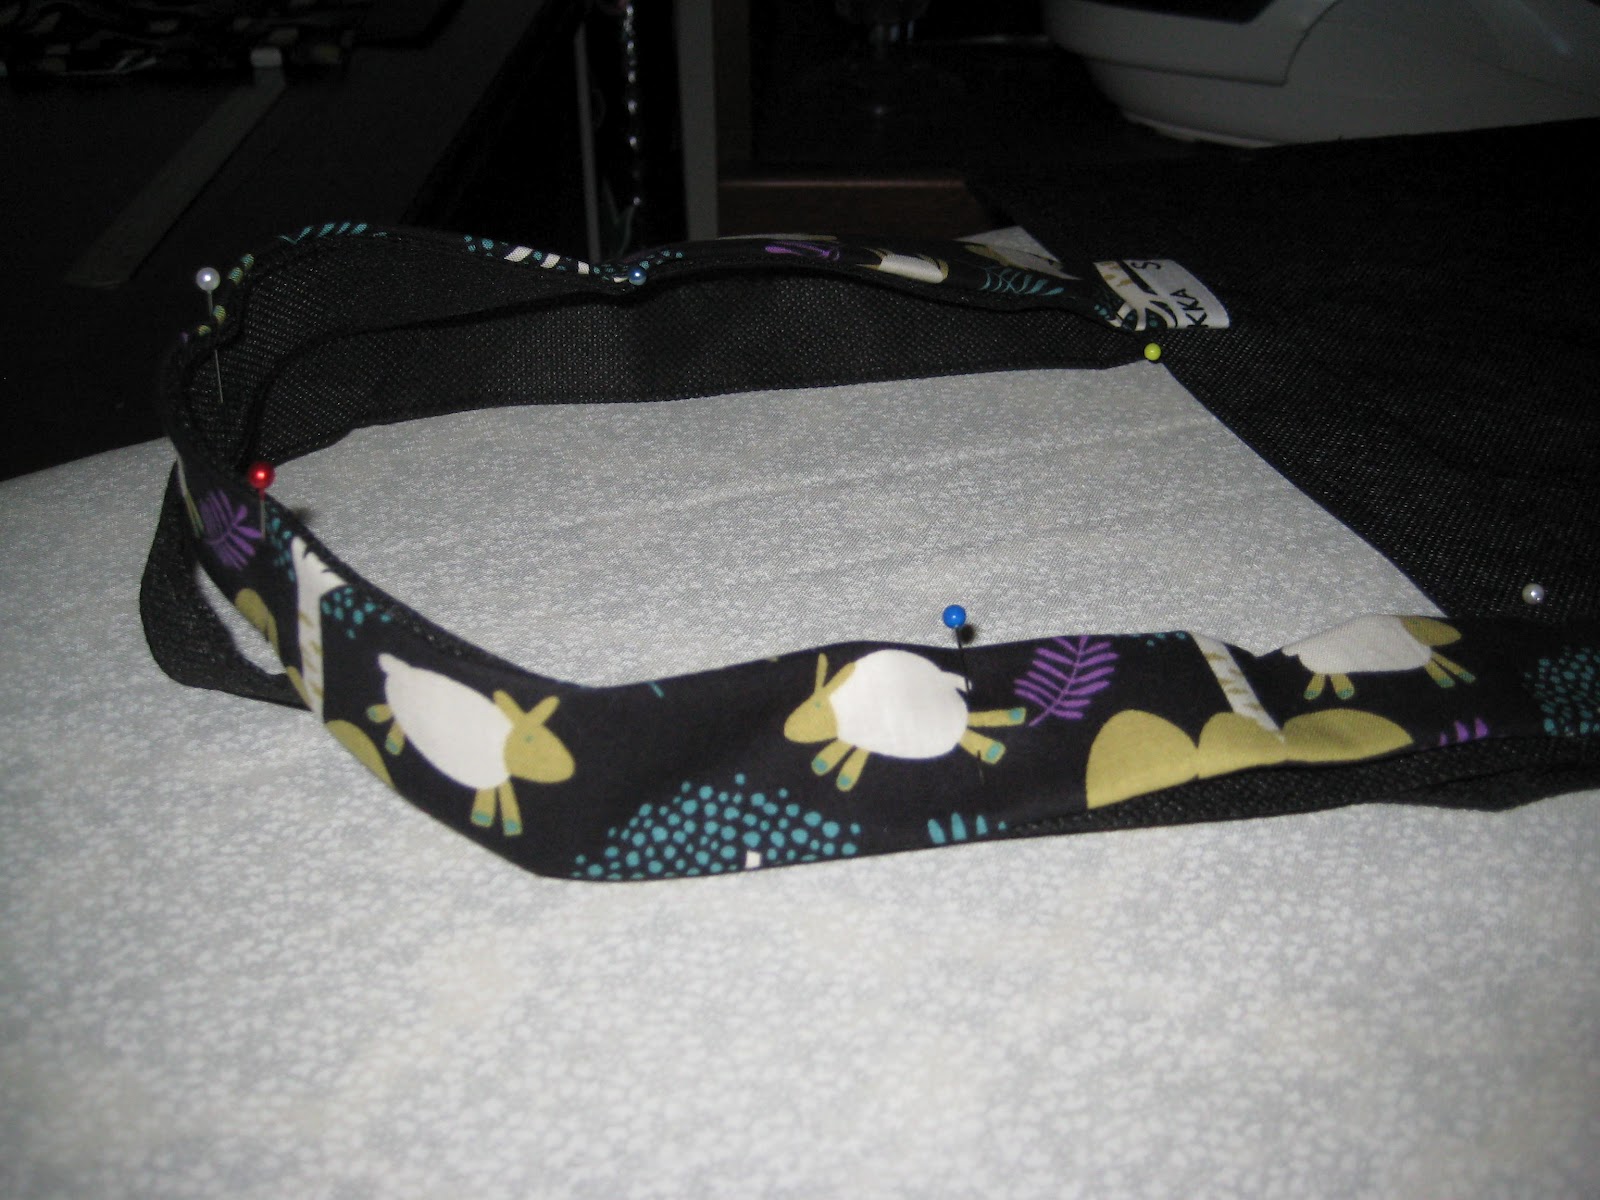
Pin the bag fabric tube to the tote bag.


Make the closure if, you decide to use one. A small pocket of fabic sewn on three sides. I put ironed some interfacing on the closure pocket to give it some strength. Leave the top open as it will be stitched with the bag fabric.


Place the closure button in place.
This is how mine worked 


Mark the cutting lines using the back of the closure  as your template. Cut smal slits in the fabric.


Place the top half of the closure on the bottom of the fabric then slide the back half into the pocket and secure


Pin closure in place on the bag. And place the other closure on the other side of the bag.


Stitch around the top of the bag. Stop at each corner and hop over the corner and then keep sewing to the next corner.


Stich down the cornes


Pin the outside pockets and stitch in place


Here the the finised bag


This is the view from the sewing room window. Must get too and wash the windows some day soon.


Monday, 16 April 2012

Making Soap

I have wanted to make soap for years but always worried that the process would be too difficult and ingredients hard to find. My dear sheep friend Eileen hooked me up with this site http://down---to---earth.blogspot.com.au/. It is a really interesting site that I love. I did not know at the time, but my daughter Alison also likes Ronda's site and got the idea to make home made Christmas presents from Rhonda. Alison wants to make soap as part of homemade Christmas. I checked out Rhonda's soap making tutorial and asked Alison if she wanted to help. http://down---to---earth.blogspot.com.au/2011/08/how-to-make-cold-processed-soap-v-2.html. We had a good time and the soap tutotrial was easy to follow also ingredients were easy to find. That was six weeks ago and we are know using our first homemade soap. The soap lathers up well and leaves your skin moisturised.
Eileen has also used Rhonda's recipe to make the soap and replaced the Copha/Coconut oil with rendered lamb fat. I used a cake of that soap and it was also excellent. I am going to try that as well

This brand of Caustic Soda is sold at Woolworths and Bunnings. Caustic Soda is a product that needs to be handled with care. Please follow the safety instructions carefully.

They also have a good recipe

http://www.pascoes.com.au/common/pdf.php?which=362&field=FILE_2

Resonably priced silicon molds can ber found here
http://stores.ebay.com.au/Walden-Accessories?_trksid=p4340.l2563

Here is the batch I made on the weekend


All the soaps layed out on the drying racks. The soap needs to cure for about 6 weeks. In that time the soap becomes hard and lasts a long time

The darker soaps were sented with Vanilla essential oil which was brown in colour and added a more creamy colour to the soap.

The white soap was perfumed with Bulgarian Rose oil which was clolourless so the soap has remained white

The soaps need to be turned each day so they dry evenly

I really enjoyed making the soap and it was easy.